ansheng’s blog!
Geth私链和开源BlockScout浏览器构建私有以太坊网络
在我们刚步入区块链开发时,有时需要进行开发和测试,最方便的情况还是我们自己部署一套私链,这样既安全又方便,启动挖矿之后币也可以无限领取。
ETH的客户端目前比较流行的就是Geth,所以我们这边文章也会使用geth跑节点,当然,为了测试方便,我们还需要一个浏览器,这里我们使用开源做的比较好的BlockScout。
环境
我们这次部署全程使用Docker,所以也就不会操作系统的烦恼,安装Docker可以参考Get Docker。
私链
这里使用ubuntu:20.04的镜像允许geth节点
docker run -d -it --name ethereum --hostname ethereum --network host ubuntu:20.04
进入ethereum容器
$ docker ps
CONTAINER ID   IMAGE          COMMAND   CREATED         STATUS         PORTS     NAMES
c86c941a8a3c   ubuntu:20.04   "bash"    3 seconds ago   Up 2 seconds             ethereum
$ docker exec -it ethereum bash
安装geth,不同的操作系统可以参考Installing Geth
apt update && apt upgrade -y
apt install software-properties-common vim -y
add-apt-repository -y ppa:ethereum/ethereum
apt update && apt install ethereum -y
创建geth数据存放目录
mkdir /data
创建默认账户,在运行geth的时候可以设置挖矿收益发放到此地址
geth --datadir /data account new
......
# 输入密码
Password:
Repeat password:
# 记住下面的key
Your new key was generated
Public address of the key:   0x01461FB75c23ca5a061758120cb085C5100AB122
......
准备创始节点配置文件
$ vim /data/genesis.json
{
   "config":{
      "chainId":9,
      "homesteadBlock":0,
      "eip150Block":0,
      "eip155Block":0,
      "eip158Block":0,
      "byzantiumBlock":0,
      "constantinopleBlock":0,
      "petersburgBlock":0,
      "istanbulBlock":0
   },
   "alloc":{},
   "coinbase":"0x0000000000000000000000000000000000000000",
   "difficulty":"0x20000",
   "extraData":"",
   "gasLimit":"0x2fefd8",
   "nonce":"0x0000000000000042",
   "mixhash":"0x0000000000000000000000000000000000000000000000000000000000000000",
   "parentHash":"0x0000000000000000000000000000000000000000000000000000000000000000",
   "timestamp":"0x00"
}
初始化geth
geth --nousb --datadir /data init /data/genesis.json
创建运行geth脚本
$ vim /data/run.sh
geth --snapshot=false \\
     --identity "localdevnet" \\
     --networkid 9 \\
     --datadir /data \\
     --cache 2048 \\
     --allow-insecure-unlock \\
     --gcmode=archive \\
     --syncmode=full \\
     --mine \\
     --miner.threads=1 \\
     --miner.etherbase=0x01461FB75c23ca5a061758120cb085C5100AB122 \\
     --http \\
     --http.addr 0.0.0.0 \\
     --http.port 24236 \\
     --http.corsdomain "*" \\
     --ws \\
     --ws.addr 0.0.0.0 \\
     --ws.port 12412 \\
     --ws.api txpool,web3,eth,debug,ethash,net \\
     --http.api txpool,web3,eth,debug,ethash,net \\
     --ws.origins "*" >> /data/geth.log 2>&1
这里我们使用nohub让geth在后台运行
nohup /bin/bash /data/run.sh &
查看日志
$ tail -f /data/geth.log
# 如果看到类型信息则表示已经有挖出来的块了
INFO [12-26|05:40:14.817] 🔨 mined potential block                  number=14 hash=b8a3d8..4aa61b
进入console,一些基本操作
$ geth attach /data/geth.ipc
> eth.accounts
["0x01461fb75c23ca5a061758120cb085c5100ab122"]
> eth.getBalance(eth.accounts[0])
22000000000000000000
退出容器
> exit
$ exit
docker-componse方式运行
这里写了一个简单的脚本,有需要的可以按照下面的方式进行操作
$ mkdir -p ~/deploy/ethereum
$ cd ~/deploy/ethereum
$ vim docker-compose.yml
version: "3.9"

services:

  ethereum:
    image: ethereum/client-go:stable
    container_name: ethereum
    restart: always
    network_mode: host
    volumes: [ "./data:/data" ]
    entrypoint: /bin/sh
    command: /data/scripts/docker-entrypoint.sh
$ mkdir -p data/scripts
$ vim data/scripts/docker-entrypoint.sh
#!/bin/sh

if [ ! -f /data/.init ]; then
    echo 123456 > /tmp/password
    geth account new --datadir /data --password /tmp/password
    geth init --datadir /data /data/genesis.json
    touch /data/.init
fi

address=0x$(find /data/keystore -type f -name "UTC--*" | awk -F- '{print $NF}')
api=debug,web3,eth,txpool,ethash,net

geth --snapshot=false \\
     --identity "localdevnet" \\
     --networkid 9 \\
     --datadir /data \\
     --allow-insecure-unlock \\
     --gcmode=archive \\
     --syncmode=full \\
     --mine \\
     --miner.threads=1 \\
     --miner.etherbase=${address} \\
     --http \\
     --http.addr 0.0.0.0 \\
     --http.port 24236 \\
     --http.corsdomain "*" \\
     --http.api ${api} \\
     --ws \\
     --ws.addr 0.0.0.0 \\
     --ws.port 12412 \\
     --ws.origins "*" \\
     --ws.api ${api} >> /data/ethereum.log 2>&1
$ vim data/genesis.json
{
  "config":{
    "chainId":9,
    "homesteadBlock":0,
    "eip150Block":0,
    "eip155Block":0,
    "eip158Block":0,
    "byzantiumBlock":0,
    "constantinopleBlock":0,
    "petersburgBlock":0,
    "istanbulBlock":0
  },
  "alloc":{},
  "coinbase":"0x0000000000000000000000000000000000000000",
  "difficulty":"0x20000",
  "extraData":"",
  "gasLimit":"0x2fefd8",
  "nonce":"0x0000000000000042",
  "mixhash":"0x0000000000000000000000000000000000000000000000000000000000000000",
  "parentHash":"0x0000000000000000000000000000000000000000000000000000000000000000",
  "timestamp":"0x00"
}
$ docker-compose up -d
$ tail -f data/ethereum.log
浏览器
BlockScout提供手动部署和Docker部署两种方式,因为我们只是开发使用,为了方便起见,所以我们通过Docker的方式部署,因为这样更简单。
下载源码
mkdir ~/deploy
cd ~/deploy
git clone https://github.com/blockscout/blockscout
运行
$ cd blockscout/docker
$ COIN=ETH \
ETHEREUM_JSONRPC_VARIANT=geth \
ETHEREUM_JSONRPC_HTTP_URL=http://localhost:24236 \
ETHEREUM_JSONRPC_WS_URL=ws://localhost:12412 \
BLOCK_TRANSFORMER=base \
NETWORK=Ethereum \
SUBNETWORK=ETH \
make start
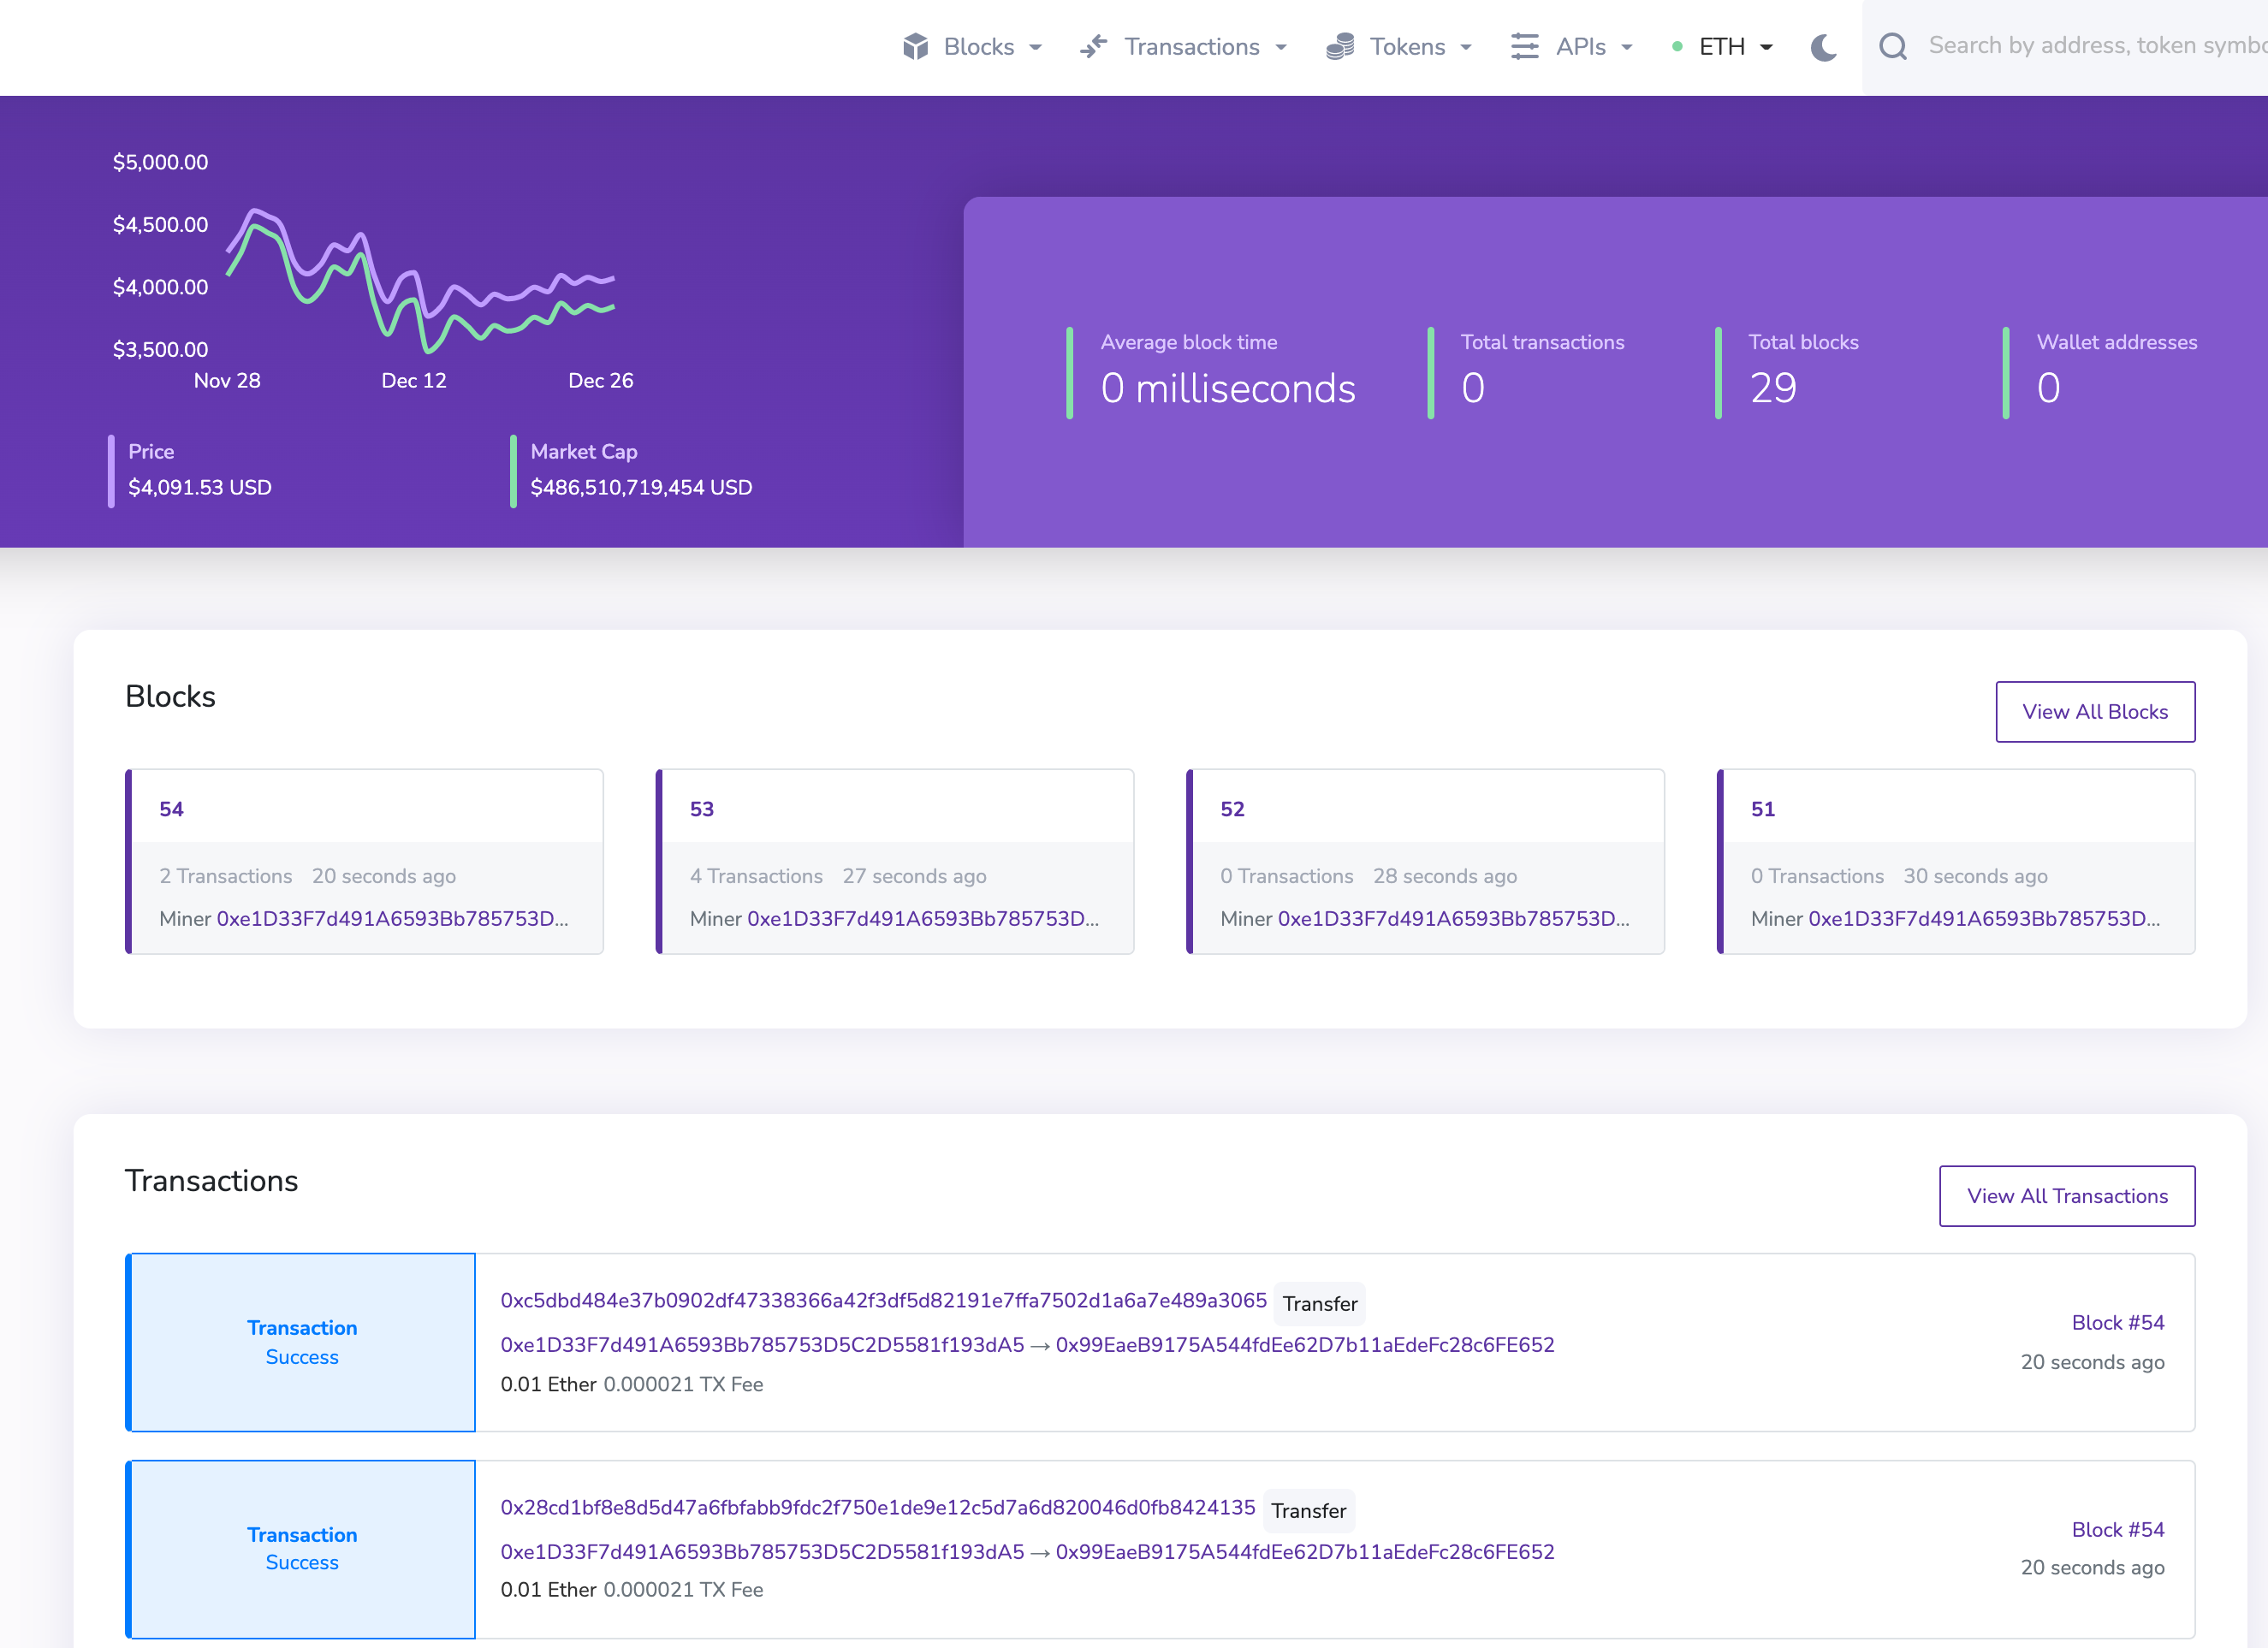
如果没有安装make包则需要通过apt install make -y,进行安装,不然会报错。运行过程可能会有些漫长,因为会build一个镜像,默认情况下浏览器会监听在4000端口下,如果没有配置数据库,blockscout会用Docker在本地自动运行一个postgresql数据库容器,用于存放链的数据,更多blockscout参数,请参考Docker Integration (Local Use Only)。
如果你的geth节点运行的是clique poa,则需要把BLOCK_TRANSFORMER=base改为BLOCK_TRANSFORMER=clique。
我们在浏览器中打开http://IP:4000就可以看到基本的页面了