ansheng’s blog!
CentOS部署FreeIPA Server和FreeIPA Client
FreeIPA是针对Linux/UNIX网络环境的统一身份验证和访问控制解决方案,详细的介绍你可以参考官网。
本文将在CentOS 7下部署FreeIPA Server,我曾尝试在CentOS 8下面部署FreeIPA Server,但是很不幸,各种错误源源不断,并无法解决,无奈只能在CentOS 7下面部署,且非常顺利,FreeIPA Client将在CentOS 8下部署。
环境
主域我们将会使用corp.ansheng.me。
| 主机名 | 内部IP | 外部IP | 系统 |
|---|---|---|---|
| ipa.corp.ansheng.me | 10.170.0.41 | 34.92.40.93 | CentOS 7 |
| client.corp.ansheng.me | 10.170.0.42 | 35.220.235.42 | CentOS 8 |
下面是每个机器的初始化操作,主要执行以下操作
- 关闭SELINUX
- 设置主机名
- 更新系统
- 添加hosts解析或者设置DNS
FreeIPA Server
$ whoami
root
$ free -h
              total        used        free      shared  buff/cache   available
Mem:           3.7G        196M        3.3G        8.4M        171M        3.3G
Swap:            0B          0B          0B
$ cat /proc/cpuinfo | grep processor | wc -l
2
$ sed -i 's/^SELINUX=.*/SELINUX=disabled/g' /etc/selinux/config
$ setenforce 0
$ hostnamectl set-hostname ipa.corp.ansheng.me
$ yum update -y
$ reboot
$ cat /etc/redhat-release
CentOS Linux release 7.9.2009 (Core)
如果你用的是GCP,在重启之后hostname会恢复成原来的样子,所以你需要再次执行下面的指令
$ hostnamectl set-hostname ipa.corp.ansheng.me
$ hostname
ipa.corp.ansheng.me
添加HOSTS解析
$ vi /etc/hosts
127.0.0.1   localhost localhost.localdomain localhost4 localhost4.localdomain4
::1         localhost localhost.localdomain localhost6 localhost6.localdomain6
10.170.0.41 ipa.corp.ansheng.me ipa # 要放在127下面,并在其他host记录前面
........
FreeIPA Client
$ whoami
root
$ free -h
              total        used        free      shared  buff/cache   available
Mem:          818Mi       231Mi       283Mi       5.0Mi       303Mi       464Mi
Swap:            0B          0B          0B
$ cat /proc/cpuinfo | grep processor | wc -l
2
$ sed -i 's/^SELINUX=.*/SELINUX=disabled/g' /etc/selinux/config
$ setenforce 0
$ hostnamectl set-hostname client.corp.ansheng.me
$ dnf update -y
$ reboot
$ cat /etc/redhat-release
CentOS Linux release 8.2.2004 (Core)
如果你用的是GCP,在重启之后hostname会恢复成原来的样子,所以你需要再次执行下面的指令
$ hostnamectl set-hostname client.corp.ansheng.me
$ hostname
client.corp.ansheng.me
在部署之前,我建议你先看一下FreeIPA官方的部署建议
FreeIPA Server
安装所需要的软件包
$ yum install ipa-server ipa-server-dns -y
初始化
$ ipa-server-install \\
  -r CORP.ANSHENG.ME \\
  --mkhomedir \\
  --setup-dns \\
  --forwarder=8.8.8.8 \\
  --forwarder=1.1.1.1 \\
  --no-dnssec-validation \\
  --ds-password ds-password \\
  --admin-password admin-password
|选项|描述| |:–|:–| |-r CORP.ANSHENG.ME |主域,大写| |–mkhomedir |用户首次登录自动创建家目录| |–setup-dns |配置DNS| |–forwarder=8.8.8.8 |上游DNS1| |–forwarder=1.1.1.1 |上游DNS2| |–no-dnssec-validation |禁用dnssec验证| |–ds-password ds-password |目录管理员密码| |–admin-password admin-password |管理员用户密码|
下面是执行ipa-server-install之后输出的log
The log file for this installation can be found in /var/log/ipaserver-install.log
==============================================================================
This program will set up the IPA Server.

This includes:
  * Configure a stand-alone CA (dogtag) for certificate management
  * Configure the Network Time Daemon (ntpd)
  * Create and configure an instance of Directory Server
  * Create and configure a Kerberos Key Distribution Center (KDC)
  * Configure Apache (httpd)
  * Configure DNS (bind)
  * Configure the KDC to enable PKINIT

To accept the default shown in brackets, press the Enter key.

WARNING: conflicting time&date synchronization service 'chronyd' will be disabled
in favor of ntpd

Enter the fully qualified domain name of the computer
on which you're setting up server software. Using the form
<hostname>.<domainname>
Example: master.example.com.

Server host name [ipa.corp.ansheng.me]: # 回车

Warning: skipping DNS resolution of host ipa.corp.ansheng.me
The domain name has been determined based on the host name.

Please confirm the domain name [corp.ansheng.me]: # 回车

Checking DNS domain corp.ansheng.me., please wait ...
Do you want to search for missing reverse zones? [yes]: # 回车

The IPA Master Server will be configured with:
Hostname:       ipa.corp.ansheng.me
IP address(es): 10.170.0.41
Domain name:    corp.ansheng.me
Realm name:     CORP.ANSHENG.ME

BIND DNS server will be configured to serve IPA domain with:
Forwarders:       8.8.8.8, 1.1.1.1
Forward policy:   only
Reverse zone(s):  No reverse zone

WARNING: Realm name does not match the domain name.
You will not be able to establish trusts with Active Directory unless
the realm name of the IPA server matches its domain name.

Continue to configure the system with these values? [no]: yes # yes

The following operations may take some minutes to complete.
Please wait until the prompt is returned.

Configuring NTP daemon (ntpd)
  [1/4]: stopping ntpd
  [2/4]: writing configuration
  [3/4]: configuring ntpd to start on boot
  [4/4]: starting ntpd
Done configuring NTP daemon (ntpd).
Configuring directory server (dirsrv). Estimated time: 30 seconds
  [1/45]: creating directory server instance
  [2/45]: enabling ldapi
  [3/45]: configure autobind for root
  [4/45]: stopping directory server
  [5/45]: updating configuration in dse.ldif
  [6/45]: starting directory server
  [7/45]: adding default schema
  [8/45]: enabling memberof plugin
  [9/45]: enabling winsync plugin
  [10/45]: configure password logging
  [11/45]: configuring replication version plugin
  [12/45]: enabling IPA enrollment plugin
  [13/45]: configuring uniqueness plugin
  [14/45]: configuring uuid plugin
  [15/45]: configuring modrdn plugin
  [16/45]: configuring DNS plugin
  [17/45]: enabling entryUSN plugin
  [18/45]: configuring lockout plugin
  [19/45]: configuring topology plugin
  [20/45]: creating indices
  [21/45]: enabling referential integrity plugin
  [22/45]: configuring certmap.conf
  [23/45]: configure new location for managed entries
  [24/45]: configure dirsrv ccache
  [25/45]: enabling SASL mapping fallback
  [26/45]: restarting directory server
  [27/45]: adding sasl mappings to the directory
  [28/45]: adding default layout
  [29/45]: adding delegation layout
  [30/45]: creating container for managed entries
  [31/45]: configuring user private groups
  [32/45]: configuring netgroups from hostgroups
  [33/45]: creating default Sudo bind user
  [34/45]: creating default Auto Member layout
  [35/45]: adding range check plugin
  [36/45]: creating default HBAC rule allow_all
  [37/45]: adding entries for topology management
  [38/45]: initializing group membership
  [39/45]: adding master entry
  [40/45]: initializing domain level
  [41/45]: configuring Posix uid/gid generation
  [42/45]: adding replication acis
  [43/45]: activating sidgen plugin
  [44/45]: activating extdom plugin
  [45/45]: configuring directory to start on boot
Done configuring directory server (dirsrv).
Configuring Kerberos KDC (krb5kdc)
  [1/10]: adding kerberos container to the directory
  [2/10]: configuring KDC
  [3/10]: initialize kerberos container
  [4/10]: adding default ACIs
  [5/10]: creating a keytab for the directory
  [6/10]: creating a keytab for the machine
  [7/10]: adding the password extension to the directory
  [8/10]: creating anonymous principal
  [9/10]: starting the KDC
  [10/10]: configuring KDC to start on boot
Done configuring Kerberos KDC (krb5kdc).
Configuring kadmin
  [1/2]: starting kadmin
  [2/2]: configuring kadmin to start on boot
Done configuring kadmin.
Configuring ipa-custodia
  [1/5]: Making sure custodia container exists
  [2/5]: Generating ipa-custodia config file
  [3/5]: Generating ipa-custodia keys
  [4/5]: starting ipa-custodia
  [5/5]: configuring ipa-custodia to start on boot
Done configuring ipa-custodia.
Configuring certificate server (pki-tomcatd). Estimated time: 3 minutes
  [1/30]: configuring certificate server instance
  [2/30]: secure AJP connector
  [3/30]: reindex attributes
  [4/30]: exporting Dogtag certificate store pin
  [5/30]: stopping certificate server instance to update CS.cfg
  [6/30]: backing up CS.cfg
  [7/30]: disabling nonces
  [8/30]: set up CRL publishing
  [9/30]: enable PKIX certificate path discovery and validation
  [10/30]: starting certificate server instance
  [11/30]: configure certmonger for renewals
  [12/30]: requesting RA certificate from CA
  [13/30]: setting audit signing renewal to 2 years
  [14/30]: restarting certificate server
  [15/30]: publishing the CA certificate
  [16/30]: adding RA agent as a trusted user
  [17/30]: authorizing RA to modify profiles
  [18/30]: authorizing RA to manage lightweight CAs
  [19/30]: Ensure lightweight CAs container exists
  [20/30]: configure certificate renewals
  [21/30]: configure Server-Cert certificate renewal
  [22/30]: Configure HTTP to proxy connections
  [23/30]: restarting certificate server
  [24/30]: updating IPA configuration
  [25/30]: enabling CA instance
  [26/30]: migrating certificate profiles to LDAP
  [27/30]: importing IPA certificate profiles
  [28/30]: adding default CA ACL
  [29/30]: adding 'ipa' CA entry
  [30/30]: configuring certmonger renewal for lightweight CAs
Done configuring certificate server (pki-tomcatd).
Configuring directory server (dirsrv)
  [1/3]: configuring TLS for DS instance
  [2/3]: adding CA certificate entry
  [3/3]: restarting directory server
Done configuring directory server (dirsrv).
Configuring ipa-otpd
  [1/2]: starting ipa-otpd
  [2/2]: configuring ipa-otpd to start on boot
Done configuring ipa-otpd.
Configuring the web interface (httpd)
  [1/22]: stopping httpd
  [2/22]: setting mod_nss port to 443
  [3/22]: setting mod_nss cipher suite
  [4/22]: setting mod_nss protocol list to TLSv1.2
  [5/22]: setting mod_nss password file
  [6/22]: enabling mod_nss renegotiate
  [7/22]: disabling mod_nss OCSP
  [8/22]: adding URL rewriting rules
  [9/22]: configuring httpd
  [10/22]: setting up httpd keytab
  [11/22]: configuring Gssproxy
  [12/22]: setting up ssl
  [13/22]: configure certmonger for renewals
  [14/22]: importing CA certificates from LDAP
  [15/22]: publish CA cert
  [16/22]: clean up any existing httpd ccaches
  [17/22]: configuring SELinux for httpd
  [18/22]: create KDC proxy config
  [19/22]: enable KDC proxy
  [20/22]: starting httpd
  [21/22]: configuring httpd to start on boot
  [22/22]: enabling oddjobd
Done configuring the web interface (httpd).
Configuring Kerberos KDC (krb5kdc)
  [1/1]: installing X509 Certificate for PKINIT
Done configuring Kerberos KDC (krb5kdc).
Applying LDAP updates
Upgrading IPA:. Estimated time: 1 minute 30 seconds
  [1/10]: stopping directory server
  [2/10]: saving configuration
  [3/10]: disabling listeners
  [4/10]: enabling DS global lock
  [5/10]: disabling Schema Compat
  [6/10]: starting directory server
  [7/10]: upgrading server
  [8/10]: stopping directory server
  [9/10]: restoring configuration
  [10/10]: starting directory server
Done.
Restarting the KDC
Configuring DNS (named)
  [1/11]: generating rndc key file
  [2/11]: adding DNS container
  [3/11]: setting up our zone
  [4/11]: setting up our own record
  [5/11]: setting up records for other masters
  [6/11]: adding NS record to the zones
  [7/11]: setting up kerberos principal
  [8/11]: setting up named.conf
  [9/11]: setting up server configuration
  [10/11]: configuring named to start on boot
  [11/11]: changing resolv.conf to point to ourselves
Done configuring DNS (named).
Restarting the web server to pick up resolv.conf changes
Configuring DNS key synchronization service (ipa-dnskeysyncd)
  [1/7]: checking status
  [2/7]: setting up bind-dyndb-ldap working directory
  [3/7]: setting up kerberos principal
  [4/7]: setting up SoftHSM
  [5/7]: adding DNSSEC containers
  [6/7]: creating replica keys
  [7/7]: configuring ipa-dnskeysyncd to start on boot
Done configuring DNS key synchronization service (ipa-dnskeysyncd).
Restarting ipa-dnskeysyncd
Restarting named
Updating DNS system records
Configuring client side components
Using existing certificate '/etc/ipa/ca.crt'.
Client hostname: ipa.corp.ansheng.me
Realm: CORP.ANSHENG.ME
DNS Domain: corp.ansheng.me
IPA Server: ipa.corp.ansheng.me
BaseDN: dc=core,dc=ansheng,dc=me

Skipping synchronizing time with NTP server.
New SSSD config will be created
Configured sudoers in /etc/nsswitch.conf
Configured /etc/sssd/sssd.conf
trying <https://ipa.corp.ansheng.me/ipa/json>
[try 1]: Forwarding 'schema' to json server '<https://ipa.corp.ansheng.me/ipa/json>'
trying <https://ipa.corp.ansheng.me/ipa/session/json>
[try 1]: Forwarding 'ping' to json server '<https://ipa.corp.ansheng.me/ipa/session/json>'
[try 1]: Forwarding 'ca_is_enabled' to json server '<https://ipa.corp.ansheng.me/ipa/session/json>'
Systemwide CA database updated.
Adding SSH public key from /etc/ssh/ssh_host_rsa_key.pub
Adding SSH public key from /etc/ssh/ssh_host_ecdsa_key.pub
Adding SSH public key from /etc/ssh/ssh_host_ed25519_key.pub
[try 1]: Forwarding 'host_mod' to json server '<https://ipa.corp.ansheng.me/ipa/session/json>'
SSSD enabled
Configured /etc/openldap/ldap.conf
Configured /etc/ssh/ssh_config
Configured /etc/ssh/sshd_config
Configuring corp.ansheng.me as NIS domain.
Client configuration complete.
The ipa-client-install command was successful

==============================================================================
Setup complete

Next steps:
	1. You must make sure these network ports are open:
		TCP Ports:
		  * 80, 443: HTTP/HTTPS
		  * 389, 636: LDAP/LDAPS
		  * 88, 464: kerberos
		  * 53: bind
		UDP Ports:
		  * 88, 464: kerberos
		  * 53: bind
		  * 123: ntp

	2. You can now obtain a kerberos ticket using the command: 'kinit admin'
	   This ticket will allow you to use the IPA tools (e.g., ipa user-add)
	   and the web user interface.

Be sure to back up the CA certificates stored in /root/cacert.p12
These files are required to create replicas. The password for these
files is the Directory Manager password
安装的速度取决于你的机器配置,我尝试过在1GB内存的机器上面安装会失败,调整到4GB就可以了,2GB没测试。
- 开放端口
上面安装完成之后我们需要开放一些端口才能够进行正常的访问,如果你的防火墙已经disable了,则可以跳过这一步,否则请执行下面的指令
$ firewall-cmd --add-service={http,https,freeipa-ldap,freeipa-ldaps,dns,ntp,kerberos} --permanent
success
$ firewall-cmd --reload
success
$ firewall-cmd --list-all
trusted (active)
  target: ACCEPT
  icmp-block-inversion: no
  interfaces: eth0
  sources:
  services: dns freeipa-ldap freeipa-ldaps http https kerberos ntp
  ports:
  protocols:
  masquerade: no
  forward-ports:
  source-ports:
  icmp-blocks:
  rich rules:
- 测试
查看服务运行状态
$ ipactl status
Directory Service: RUNNING
krb5kdc Service: RUNNING
kadmin Service: RUNNING
named Service: RUNNING
httpd Service: RUNNING
ipa-custodia Service: RUNNING
ntpd Service: RUNNING
pki-tomcatd Service: RUNNING
ipa-otpd Service: RUNNING
ipa-dnskeysyncd Service: RUNNING
ipa: INFO: The ipactl command was successful
切换到admin用户
$ kinit admin
Password for admin@CORP.ANSHENG.ME:
$ id admin
uid=574000000(admin) gid=574000000(admins) 组=574000000(admins)
设置用户默认的shell
$ ipa config-mod --defaultshell=/bin/bash
  最大用户名长度: 32
  主目录: /home
  默认shell: /bin/bash
  默认用户组: ipausers
  默认的电子邮件域: corp.ansheng.me
  搜索时间限制: 2
  搜索大小限制: 100
  用户搜索字段: uid,givenname,sn,telephonenumber,ou,title
  组搜索域: cn,description
  启用迁移模式: FALSE
  Certificate Subject base: O=CORP.ANSHENG.ME
  密码过期通知(天): 4
  密码插件功能: AllowNThash, KDC:Disable Last Success
  SELinux 用户映射订单: guest_u:s0$xguest_u:s0$user_u:s0$staff_u:s0-s0:c0.c1023$sysadm_u:s0-s0:c0.c1023$unconfined_u:s0-s0:c0.c1023
  默认的SELinux用户: unconfined_u:s0-s0:c0.c1023
  默认PAC类型: MS-PAC, nfs:NONE
  IPA主服务器: ipa.corp.ansheng.me
  IPA master capable of PKINIT: ipa.corp.ansheng.me
  IPA CA服务器: ipa.corp.ansheng.me
  IPA NTP服务器: ipa.corp.ansheng.me
  IPA CA更新主服务器: ipa.corp.ansheng.me
  IPA DNS服务器: ipa.corp.ansheng.me
添加用户
$ ipa user-add ansheng --first=sheng --last=an --random
--------------
已添加用户"ansheng"
--------------
  用户登录名: ansheng
  名: sheng
  姓: an
  全名: sheng an
  显示名称: sheng an
  名字的首字母: sa
  主目录: /home/ansheng
  GECOS: sheng an
  登录shell: /bin/bash
  主机名: ansheng@CORP.ANSHENG.ME
  主体别名: ansheng@CORP.ANSHENG.ME
  User password expiration: 20201119054530Z
  邮件地址: ansheng@corp.ansheng.me
  随机密码: 9Oz-*/6Ep_UDWFjbQrg4Yl
  UID: 574000001
  GID: 574000001
  密码: True
  组成员: ipausers
  Kerberos密码可用: True
连接测试
$ hostname
ipa.corp.ansheng.me
$ ssh ansheng@ipa.corp.ansheng.me
Password: # 输入添加用户时生成的随机密码:9Oz-*/6Ep_UDWFjbQrg4Yl
Password expired. Change your password now.
Current Password:
New password: # 新密码
Retype new password: # 确认密码
Creating home directory for ansheng.
$ pwd
/home/ansheng
$ whoami
ansheng
如果你可以成功通过SSH连接到ansheng@ipa.corp.ansheng.me,则说明FreeIPA Server已经配置完成。
- Web UI
FreeIPA还为我们提供了非常好用的UI界面,如果要使用,请在本地hosts文件下添加一条解析记录
$ sudo vim /etc/hosts
......
34.92.40.93 ipa.corp.ansheng.me ipa
$ ping -c 3 ipa.corp.ansheng.me
PING ipa.corp.ansheng.me (34.92.40.93): 56 data bytes
64 bytes from 34.92.40.93: icmp_seq=0 ttl=56 time=32.277 ms
64 bytes from 34.92.40.93: icmp_seq=1 ttl=56 time=31.081 ms
64 bytes from 34.92.40.93: icmp_seq=2 ttl=56 time=29.455 ms

--- ipa.corp.ansheng.me ping statistics ---
3 packets transmitted, 3 packets received, 0.0% packet loss
round-trip min/avg/max/stddev = 29.455/30.938/32.277/1.157 ms
通过浏览器打开ipa.corp.ansheng.me这个地址,由于FreeIPA使用的是自签名证书,所以浏览器会提示SSL错误,不过没关系,我们跳过即可

进入登陆界面,输入账号admin和密码admin-password

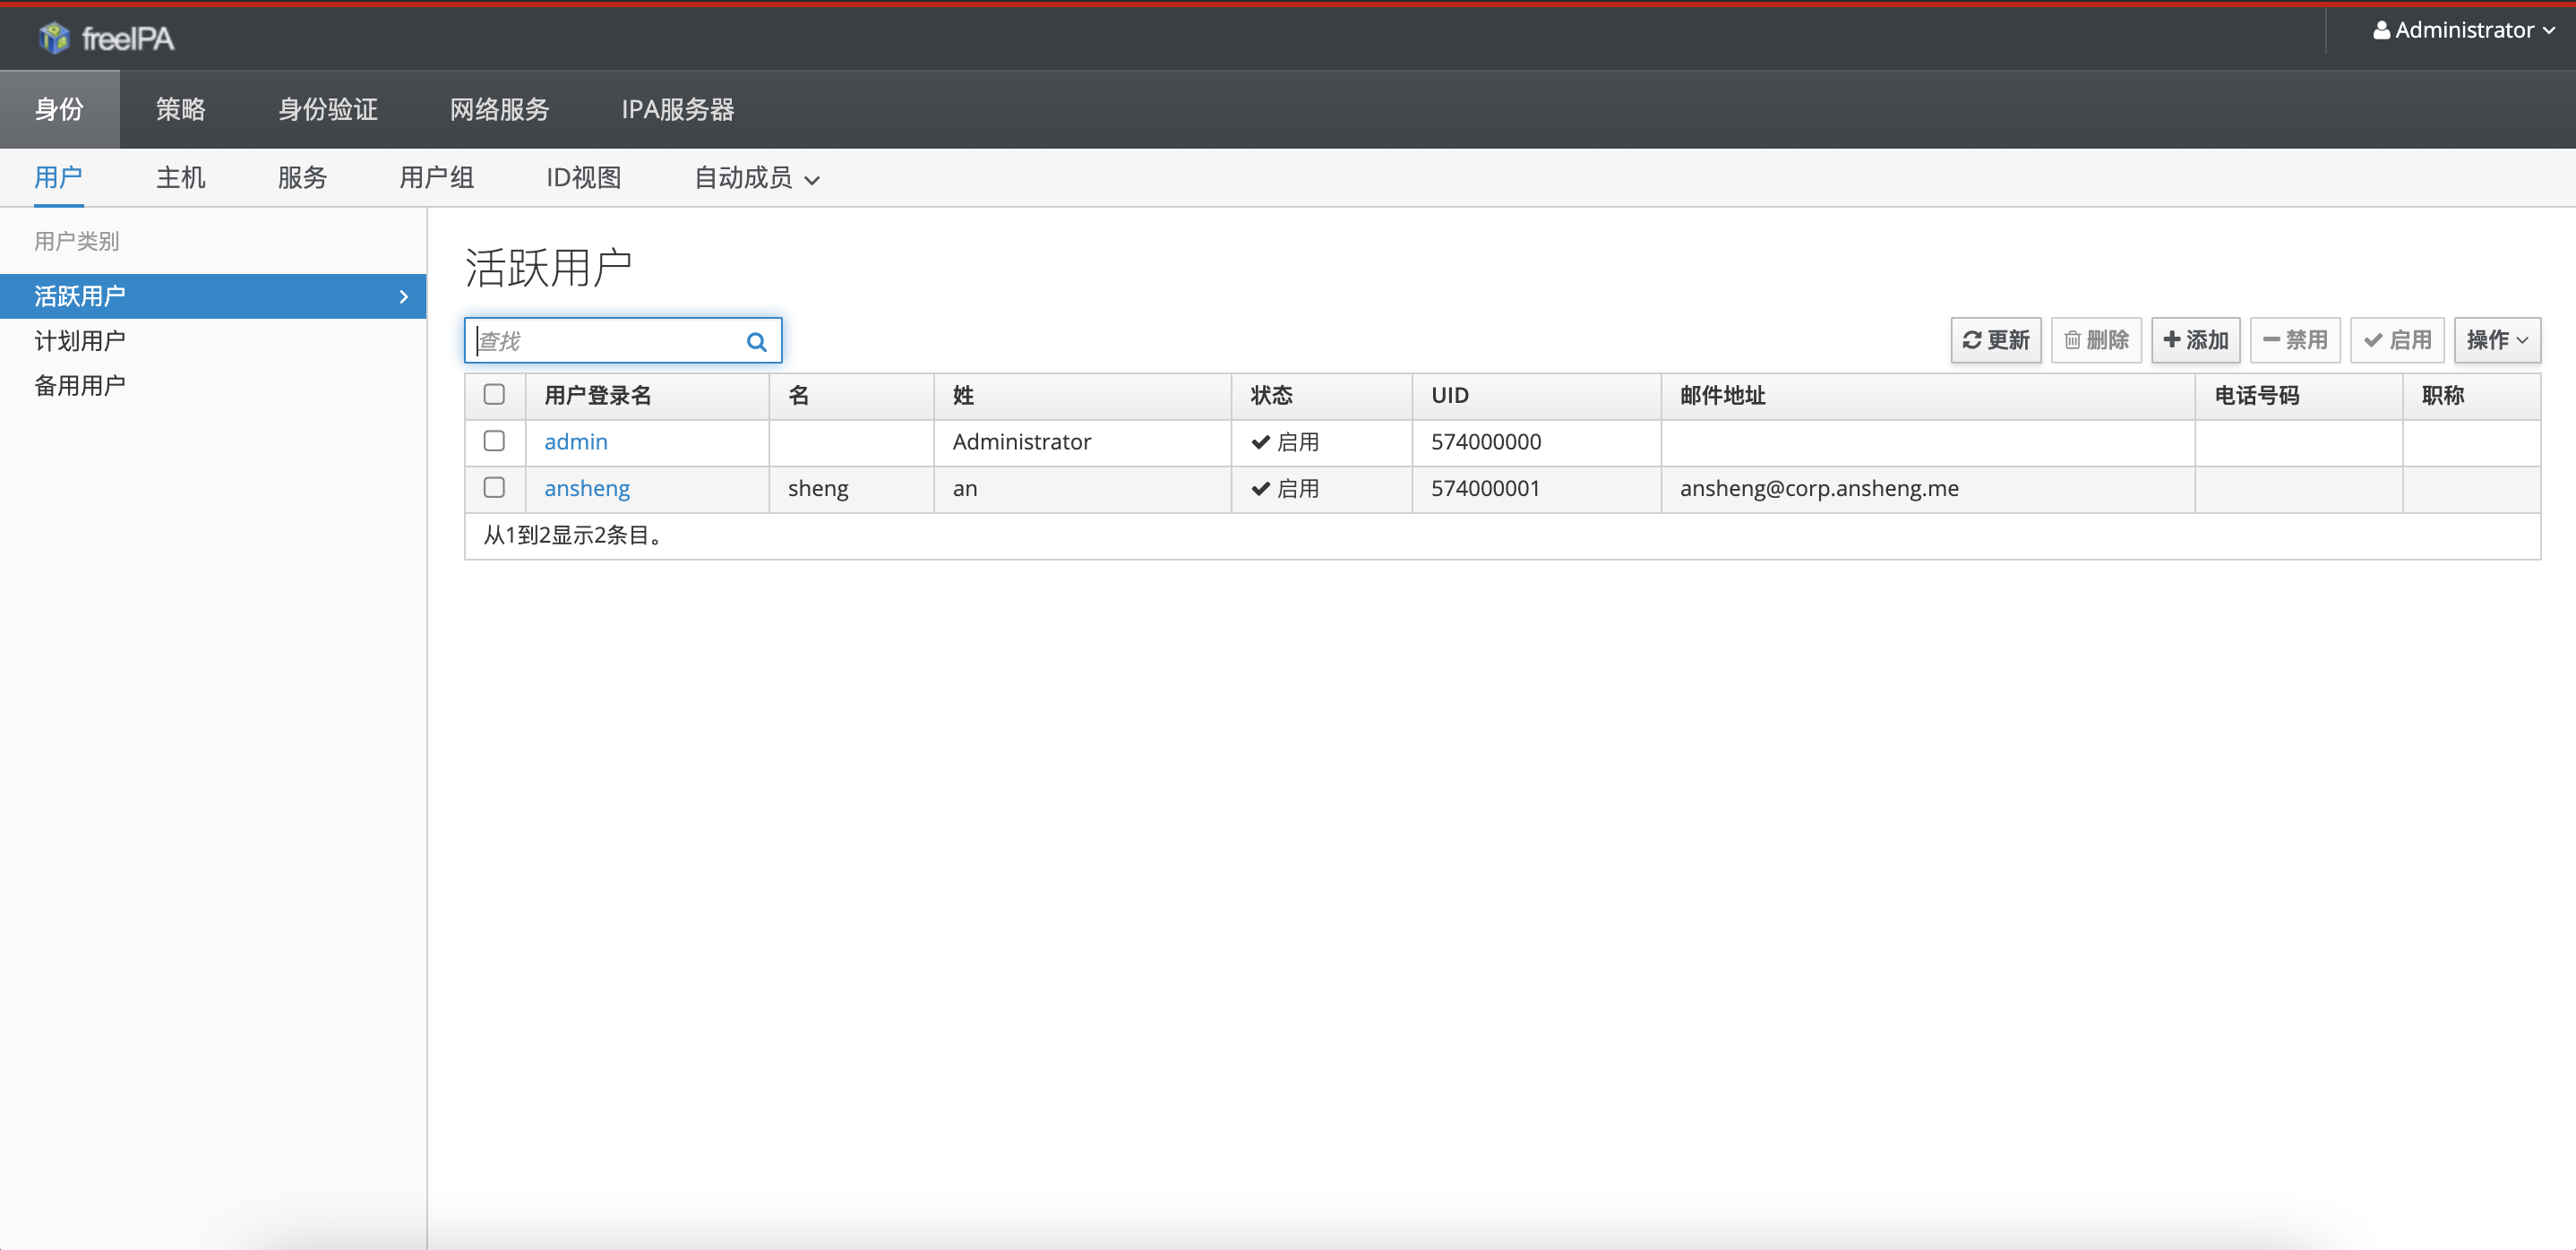
这就是FreeIPA的WebUI了,里面有很多功能,大家慢慢研究
FreeIPA Client
首先我们需要把DNS改为FreeIPA Server的地址,因为都在同一个内网,所以我们只需要填内网的地址就即可
$ vi /etc/resolv.conf
# Generated by NetworkManager
search asia-east2-a.c.rosy-algebra-275509.internal c.rosy-algebra-275509.internal google.internal corp.ansheng.me
nameserver 10.170.0.41  # 把FreeIPA Server DNS写在前面
nameserver 169.254.169.254
然后通过ping测试看看能否解析
$ ping -c 5 ipa.corp.ansheng.me
PING ipa.corp.ansheng.me (10.170.0.41) 56(84) bytes of data.
64 bytes from 10.170.0.41 (10.170.0.41): icmp_seq=1 ttl=64 time=1.44 ms
64 bytes from 10.170.0.41 (10.170.0.41): icmp_seq=2 ttl=64 time=0.316 ms
64 bytes from 10.170.0.41 (10.170.0.41): icmp_seq=3 ttl=64 time=0.279 ms
64 bytes from 10.170.0.41 (10.170.0.41): icmp_seq=4 ttl=64 time=0.269 ms
64 bytes from 10.170.0.41 (10.170.0.41): icmp_seq=5 ttl=64 time=0.295 ms

--- ipa.corp.ansheng.me ping statistics ---
5 packets transmitted, 5 received, 0% packet loss, time 74ms
rtt min/avg/max/mdev = 0.269/0.520/1.441/0.460 ms
安装客户端所需要的软件包
$ dnf module enable idm:DL1 -y
$ dnf distro-sync -y
$ dnf install ipa-client -y
初始化
$ ipa-client-install \\
    --server ipa.corp.ansheng.me \\
    --domain corp.ansheng.me \\
    --ntp-server=time.google.com \\
    --ntp-server=time.windows.com \\
    --mkhomedir
|选项|描述| |:–|:–| |–server ipa.corp.ansheng.me |IPA server| |–domain corp.ansheng.me |IPA域| |–ntp-server=time.google.com |NTP Server 1| |–ntp-server=time.windows.com |NTP Server 2| |–mkhomedir |用户首次登录自动创建家目录|
输出日志如下
This program will set up IPA client.
Version 4.8.4

Autodiscovery of servers for failover cannot work with this configuration.
If you proceed with the installation, services will be configured to always access the discovered server for all operations and will not fail over to other servers in case of failure.
Proceed with fixed values and no DNS discovery? [no]: yes # yes
Client hostname: client.corp.ansheng.me
Realm: CORP.ANSHENG.ME
DNS Domain: corp.ansheng.me
IPA Server: ipa.corp.ansheng.me
BaseDN: dc=core,dc=ansheng,dc=me
NTP server: time.google.com
NTP server: time.windows.com

Continue to configure the system with these values? [no]: yes # yes
Synchronizing time
Configuration of chrony was changed by installer.
Attempting to sync time with chronyc.
Time synchronization was successful.
User authorized to enroll computers: admin # 输入admin用户
Password for admin@CORP.ANSHENG.ME: # admin用户密码:admin-password
Successfully retrieved CA cert
    Subject:     CN=Certificate Authority,O=CORP.ANSHENG.ME
    Issuer:      CN=Certificate Authority,O=CORP.ANSHENG.ME
    Valid From:  2020-11-19 05:27:18
    Valid Until: 2040-11-19 05:27:18

Enrolled in IPA realm CORP.ANSHENG.ME
Created /etc/ipa/default.conf
Configured sudoers in /etc/authselect/user-nsswitch.conf
Configured /etc/sssd/sssd.conf
Configured /etc/krb5.conf for IPA realm CORP.ANSHENG.ME
Systemwide CA database updated.
Hostname (client.corp.ansheng.me) does not have A/AAAA record.
Missing reverse record(s) for address(es): 10.170.0.42.
Adding SSH public key from /etc/ssh/ssh_host_ed25519_key.pub
Adding SSH public key from /etc/ssh/ssh_host_ecdsa_key.pub
Adding SSH public key from /etc/ssh/ssh_host_rsa_key.pub
WARNING: The configuration pre-client installation is not managed by authselect and cannot be backed up. Uninstallation may not be able to revert to the original state.
SSSD enabled
Configured /etc/openldap/ldap.conf
Configured /etc/ssh/ssh_config
Configured /etc/ssh/sshd_config
Configuring corp.ansheng.me as NIS domain.
Client configuration complete.
The ipa-client-install command was successful
如果输出没有报错就表示安装成功了,下面我们通过SSH连接测试一下
# 连接到ipa
$ ssh ansheng@ipa.corp.ansheng.me
Password:
Last login: Thu Nov 19 05:46:46 2020 from ipa.corp.ansheng.me
$ ifconfig |grep 10.170.0
        inet 10.170.0.41  netmask 255.255.255.255  broadcast 10.170.0.41
$ exit
登出
Connection to ipa.corp.ansheng.me closed.
# 连接到client
$ ssh ansheng@client.corp.ansheng.me
Password:
$ ifconfig |grep 10.170.0
        inet 10.170.0.42  netmask 255.255.255.255  broadcast 0.0.0.0
$ logout
Connection to client.corp.ansheng.me closed.